This article intends to show you how to Cluster servers together in Wurm Unlimited
SQLite Database Browser and a File Manager/FTP Client is required
This guide is broken into expandable sections
__________________________________
Download the SQLite DataBase Browser for your operating system. We recommend using the portable app version

Install the SQLite DB browser and run it
In the top toolbar select Open Database
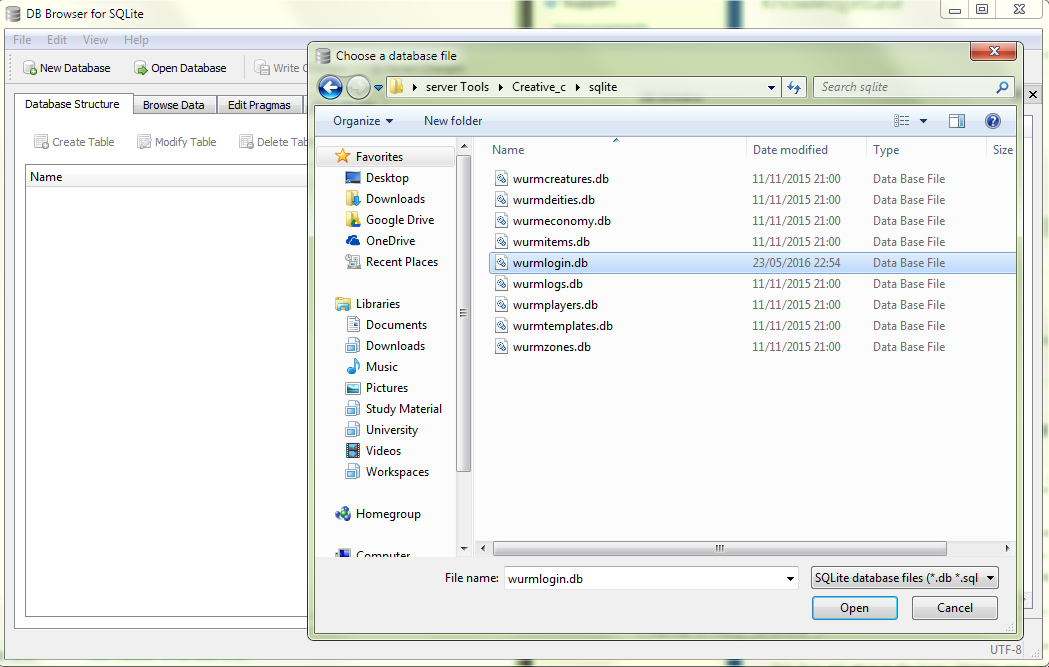
Navigate to the sqlite folder in your database folder
Open the wurmlogin.db database file
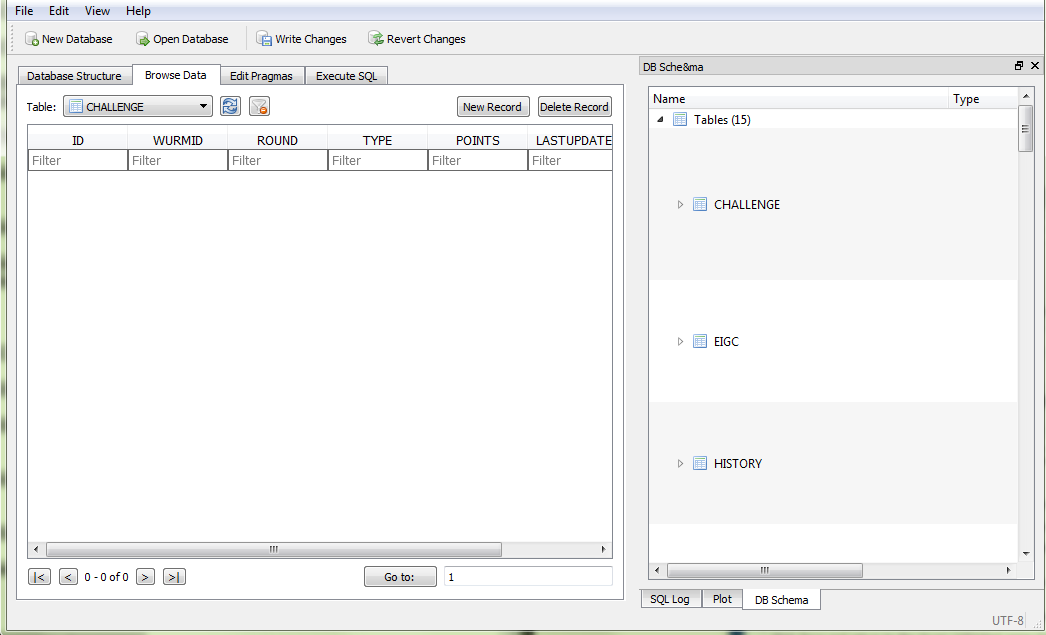
Select the second tab from the left, the Browse Data tab
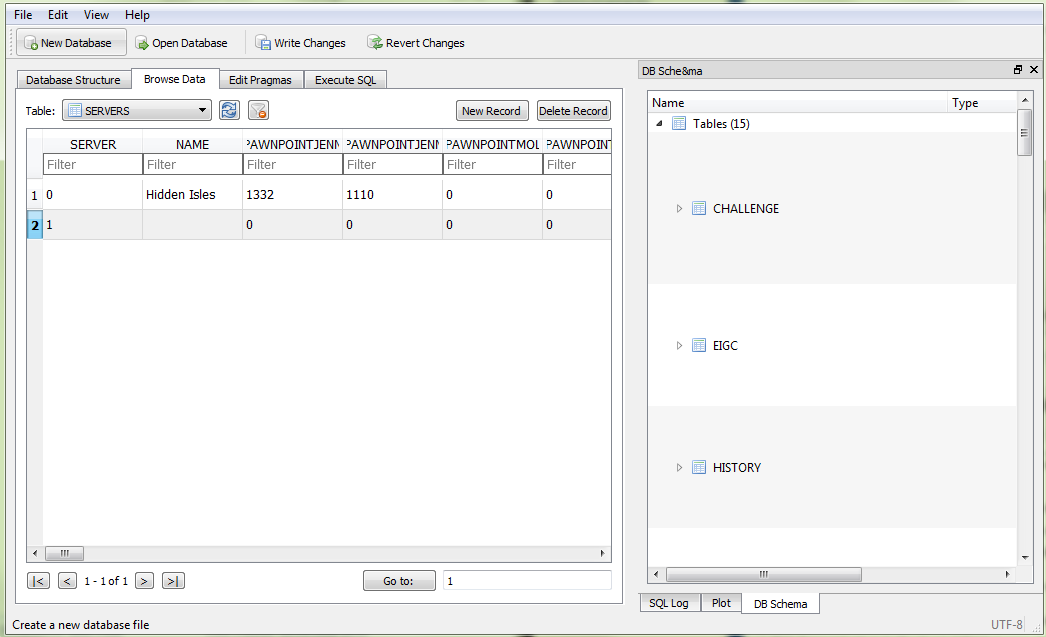
In the dropdown Table menu select SERVERS

At the right hand side of this select New Record
The first thing to do is choose a unique Server ID under SERVER for the new record
Remember the Server IDs for the existing server and the new server. They will be needed in the following step and further steps!
In the Table dropdown menu now select SERVERNEIGHBOURS
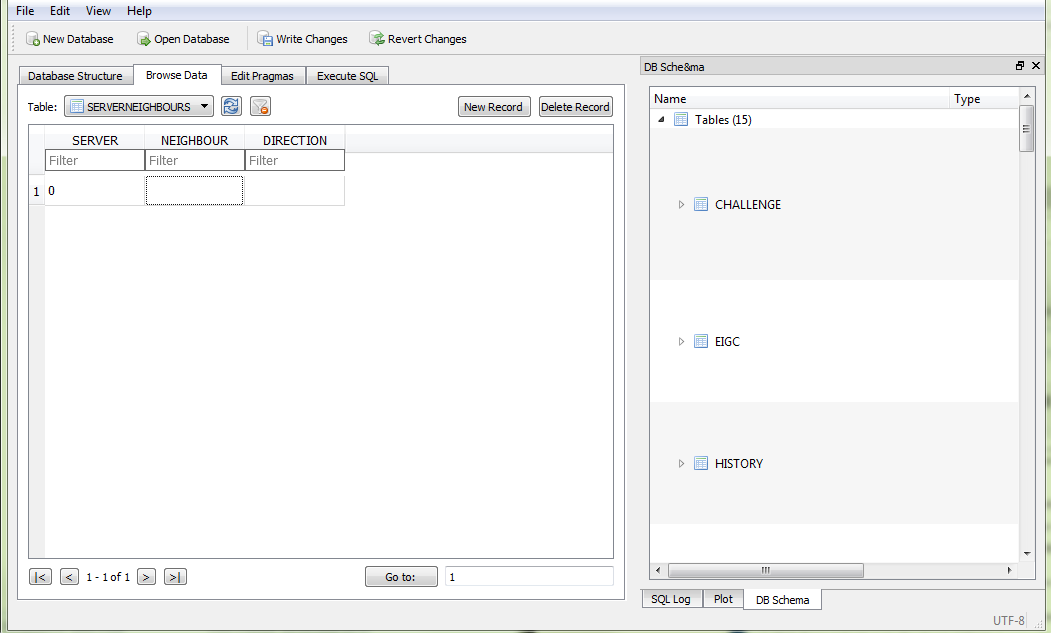
In the SERVERNEIGHBOURS table the records for your servers and which other servers they neighbour are kept
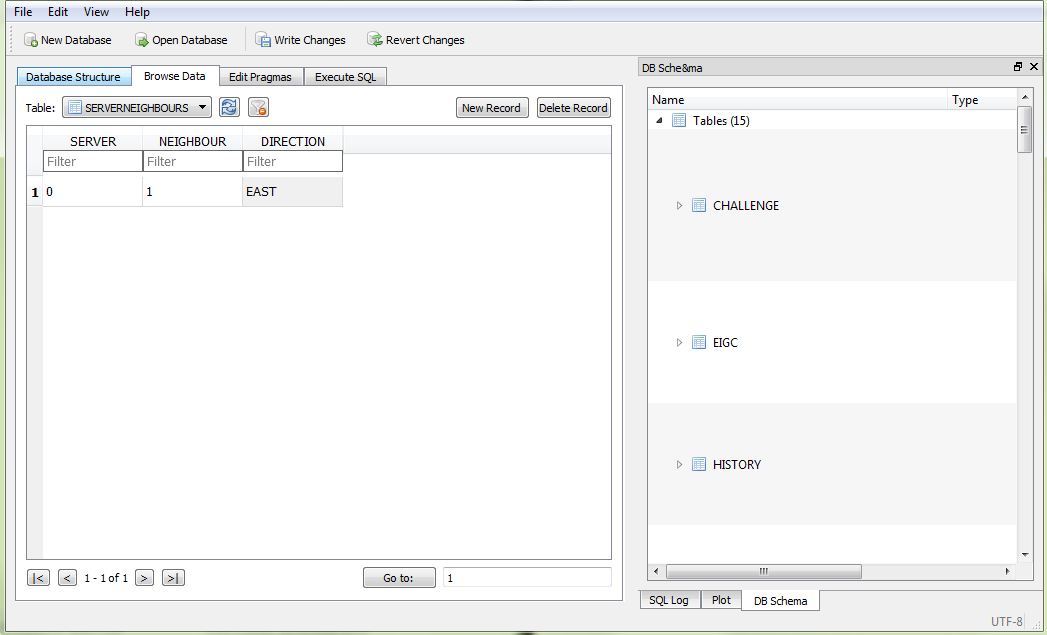
For the existing server enter the Server ID of the new server in the NEIGHBOUR attribute
In the DIRECTION attribute specify the direction you want this new neighbouring server to be in relation to the existing server
Example: EAST (all caps)
Example: EAST (all caps)
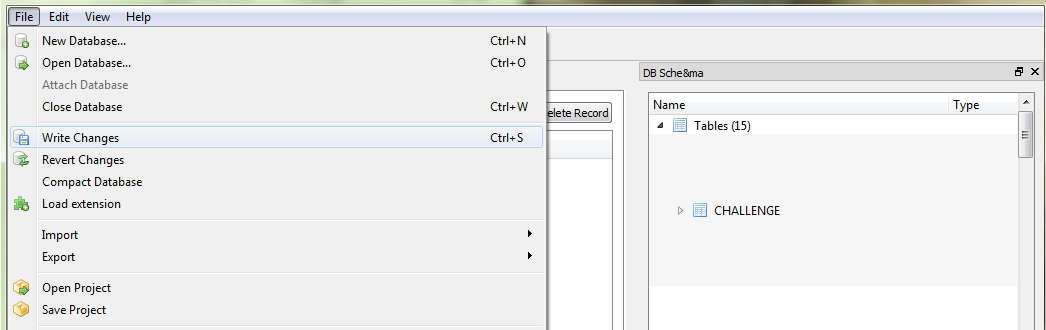
Press Ctrl+S or select Write Changes in the File menu to save the changes to the database
With a prefered FTP client or File Manager upload the whole database to your server
A related guide for FTP and File Managers can be found here:
A related guide for FTP and File Managers can be found here:
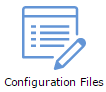
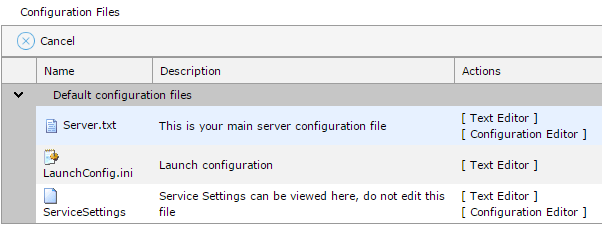
In the Wurm Unlimited game Control Panel select Configuration Files
In Configuration Files select Text Editor under Actions for the ServiceSettings
Copy down the Internal Server Port, External Server Port, RMI Port, and RMI Reg Port.
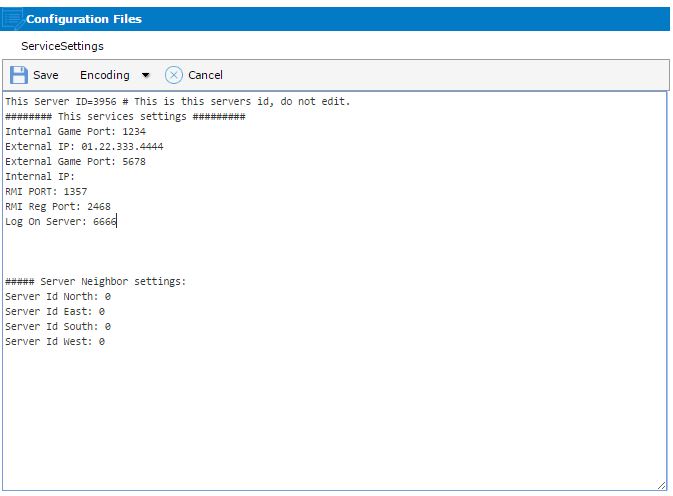
Copy down the Internal Server Port, External Server Port, RMI Port, and RMI Reg Port.
Return to Configuration Files but now select Configuration Editor under Actions for the ServiceSettings.
Find the corresponding Neighbour Settings for the DIRECTION you chose in the SERVERNEIGHBOURS Table
Example: Eastern Neighbor Settings
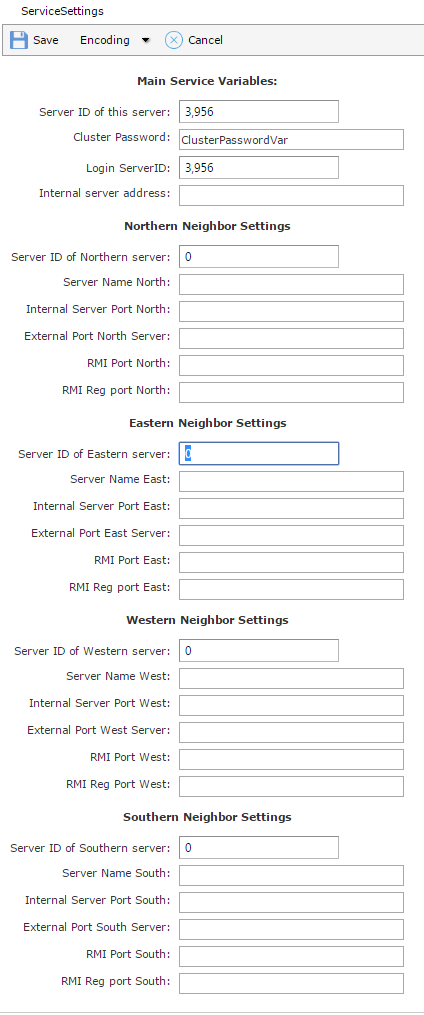
Find the corresponding Neighbour Settings for the DIRECTION you chose in the SERVERNEIGHBOURS Table
Example: Eastern Neighbor Settings
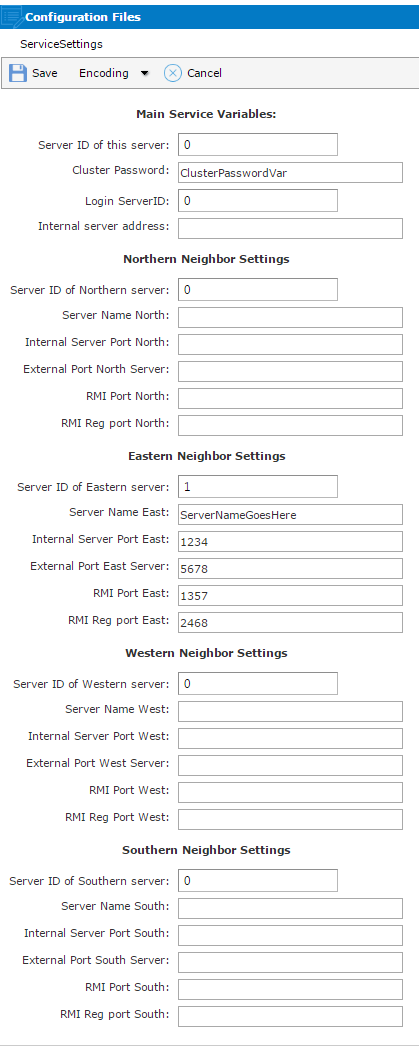
Enter the Server ID you chose for the new server from the SERVER table in the "Server ID of Eastern server:" field
Enter the server name and the relevant port information of your second server into the rest of the Settings fields
Click Save and return to the Wurm Unlimited game Control Panel. Click the "Update Database (Click before Starting Server)" option
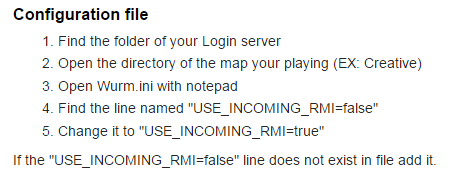
Find the folder of your Login server
Open the directory of the map you're playing (Example: Creative)
Open the Wurm.ini with notepad
Find the line named "USE_INCOMING_RMI=false" with Ctrl+F
Change it to "USE_INCOMING_RMI=true"
If the "USE_INCOMING_RMI=false" line does not exist in the file then add it